Notepad++ (Notepad Plus Plus) is one of the best text editors available in the market today. It is free, open-source, feature-rich, and supports 3rd party plugins to extend the functionality. Plugins are actually add-ons to the main software which extend and enhance the working of the base software.
There are a good number of plugins available for Notepad++ like Combine, Compare, NppFTP, and many more. Refer to the notepad++ plugins list for a complete list of plugins.
You can use two methods to install a plugin in Notepad++. One uses a plugin manager/Admin and another uses a manual method. Both methods are explained in detail in the article, with step-by-step instructions and screenshots to guide you through the process. Whether you prefer using the Plugin Manager or prefer manual installation, this article has everything you need to get started with adding plugins to Notepad++.
1. Install Plugins in Notepad++ using Plugin Manager
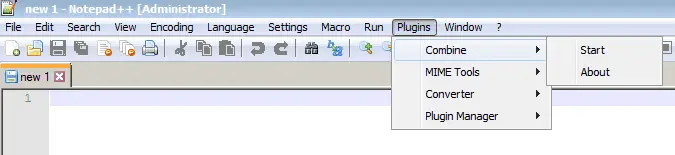
Notepad++ has a separate menu Plugins to manage the plugins repository. It lists all the active and installed plugins. You can install, update, and uninstall plugins using the Plugin Manager. The plugin manager is a plugin itself. We are going to use Combine and Compare plugin to demonstrate installation.
Below are the steps.
Step 1 – Launch Plugin Manager/Admin
Launch Notepad++ and Navigate to Plugins->Plugin Manager->Show Plugin Manager. You can also use the Keyword shortcut Alt+P to open the menu.
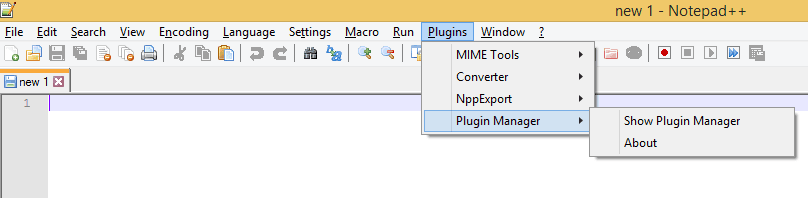
This opens a plugin manager that shows all Available, Updates, and Installed plugins for your Notepadd++ installation.
- Available – List of all available plugins.
- Updates – Plugins for which updates are available.
- Installed – List of all Installed plugins.
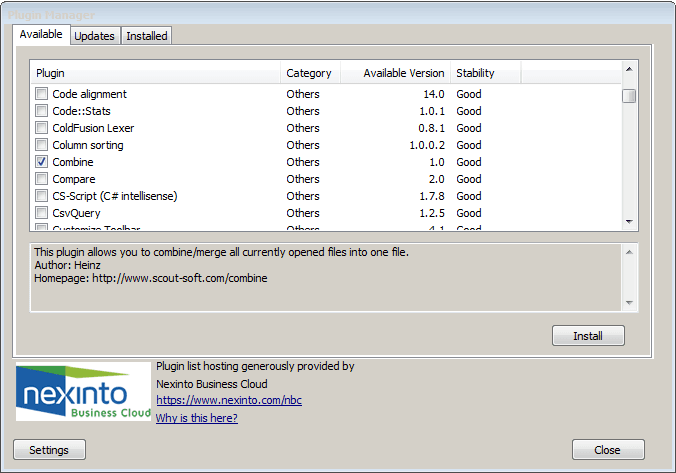
Step 2 – Search required plugin and install
In the available list tab, search for the combine plugin and select it and click the Install button.
Plugin Manager shows information like Plugin Name, Category, Available Version, and Stability. When you select the plugin you can see additional information like Author, Source, Homepage, etc
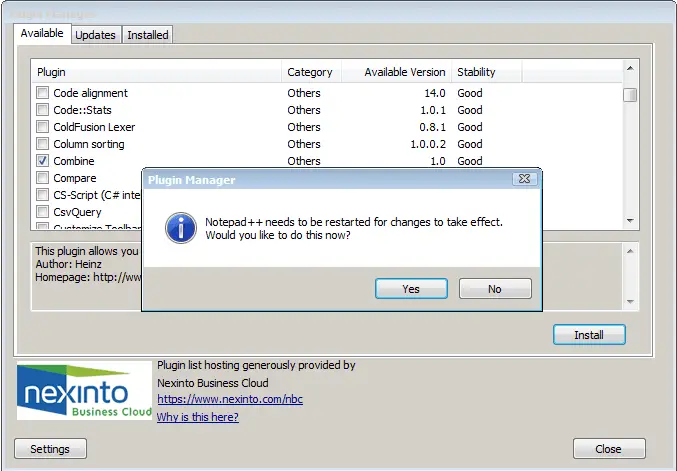
The plugin manager downloads the plugin from the respective online repository and installs it. Post-installation you get the message “Notepad++ needs to be restarted for changes to take effect. Would you like to do this now?”
Click on Yes to restart the Notepad++.
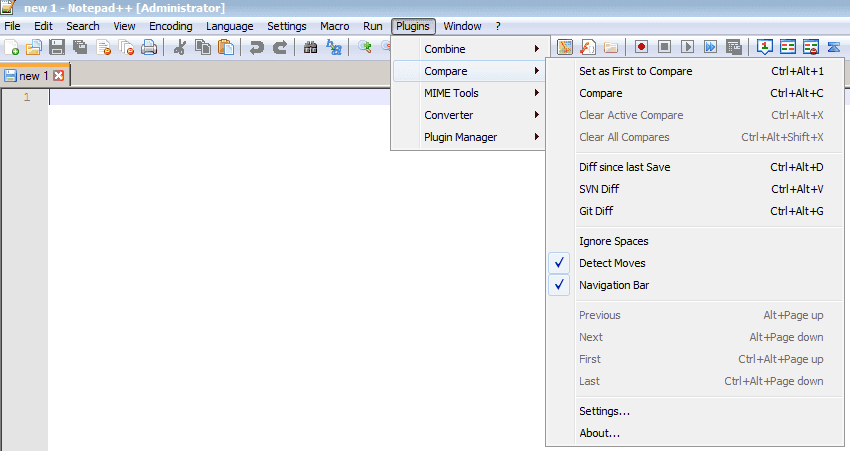
Step 3 – Check if plugin is installed and available under plugins menu
Plugin should be available under Plugins menu.
This is the most preferred and used method until the time Plugin Manager is Removed from the repository by the developer. If that is the case with you, you can use below manual method. As the Plugin Manager is also a plugin, you can use the same method to install it as well.
Some useful links for reference.
- Installer doesn’t install plugins manager #3634
- No plugin manager
- 64 bit version is without “Plugin Manager” (and NppExport) #2459
2. Manual Plugin Installation in Notepad++
There may not be the Plugin Manager available or sometimes, installation does not work using it. The plugin may not be available in this list. In that case, use the Manual Installation method.
Just to explain, I tried installing a compare plugin, but it failed with the Installation of Compare Failed message.

Manual is also a straightforward method. Just copy the respective plugin .dll file to the plugin’s directory.
Step 1 – Download Plugin Files
There is a central plugin directory that maintains the list of all Plugins. These links are not up to date as those are pointing to SourceForge Compare Plugin Repository while some of the latest code is present in GitHub. So I would suggest it is better to use the description given in the plugin manager or just Google it to get the latest code.
You can download a compare plugin from this link.
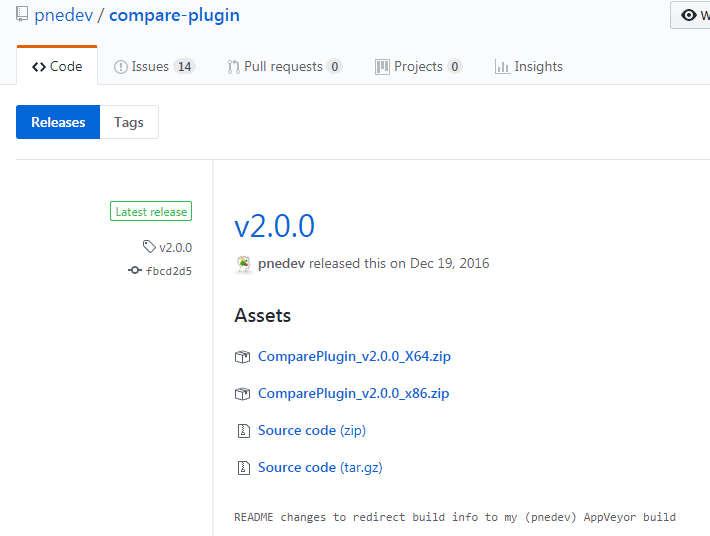
Under the releases tab, the latest dll and source code is available. Depending on the windows platform download ComparePlugin_v2.0.0_X64.zip or ComparePlugin_v2.0.0_x86.zip bit file.
Step 2 – Extract plugins files in Notepad++ plugins folder
Extract the downloaded folder in C:\Program Files (x86)\Notepad++\plugins folder. This is the folder where notepadd++ is installed. Copy extracted ComparePlugin folder and ComparePlugin.dll as shown below.

That’s it…!!!
Step 3 – Launch the plugin
Open Notepad ++ and check installed the plugin. You can see it is available under the list.
I hope you liked the article, please share and subscribe.
Summary
Installing plugins in Notepad++ is a simple process that can be done either through the built-in Plugin Manager or by manually copying the plugin files to the Notepad++ plugins folder. The Plugin Manager makes it easy to find and install plugins, while manual installation gives you more control over the process.
I hope you found this helpful. Please share and subscribe.