WordPress, Joomla, Drupal, and most other open-source CMS uses MySQL as the database to store information. It is the first choice for a Web Developer who uses PHP, Perl, or Python scripting language. Tools like XAMPP, WAMP, LAMP which provides a local web development environment comes with MySQL service along with Apache, FTP client, and Perl/Python scripting language.
Note: XAMPP ships MariaDB instead of MySQL from version 5.5.30 and 5.6.14. The commands and tools are the same for both.
XAMPP and How to Install
We have a detailed document on installing XAMPP on Windows and good articles which will help you to understand this tool better. Here I am going to cover it in brief.
XAMPP is your local web development environment that provides Apache, MySQL, FileZilla, Tomcat, Mercury web development stack. It is free and open-source. One of the most important characteristics is, it is cross-platform available for Windows, Linux, and Mac OS.
In Summary, you can install XAMPP as follow,
- Download the installer from the XAMPP download page.
- Double click on the installer and follow the on-screen instruction.
At the time of writing this article, the current version of XAMPP is 7.3.1 / PHP 7.3.1. It Includes,
- Apache 2.4.37
- MariaDB 10.1.37
- PHP 7.3.1
- phpMyAdmin 4.8.4
- OpenSSL 1.1.1a
- XAMPP Control Panel 3.2.2
- Webalizer 2.23-04
- Mercury Mail Transport System 4.63
- FileZilla FTP Server 0.9.41
- Tomcat 7.0.56 (with mod_proxy_ajp as connector)
- Strawberry Perl 7.0.56 Portable
Start XAMPP MySQL and Apache Module
XAMPP comes with easy to use control panel using which you can easily start and stop required services.
Navigate to Start -> XAMPP Contol Panel. This opens a window as shown below. Click on the Start button for Apache and MySQL Module. Successful start turns respective service green and PID(s) and Port(s) get populated with numbers and Start button label changes to Stop.
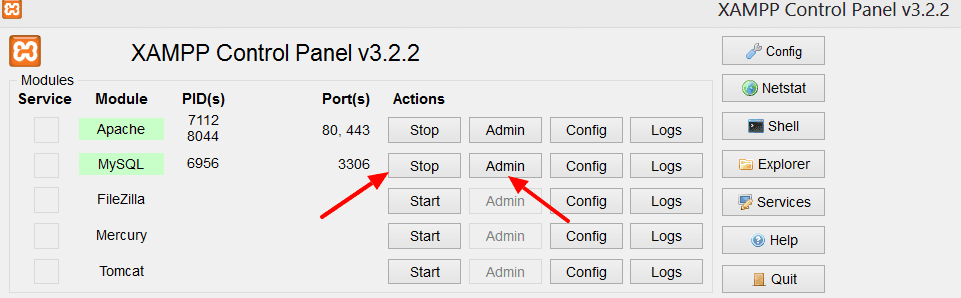
Click on the Admin button of MySQL Module to launch PHPMyAdmin. This is the interface which will help you to work with MySQL.
PHPMyAdmin
phpMyAdmin is a free software tool written in PHP, intended to handle the administration of MySQL over the Web. phpMyAdmin supports a wide range of operations on MySQL and MariaDB. Frequently used operations (managing databases, tables, columns, relations, indexes, users, permissions, etc) can be performed via the user interface, while you still have the ability to directly execute any SQL statement.
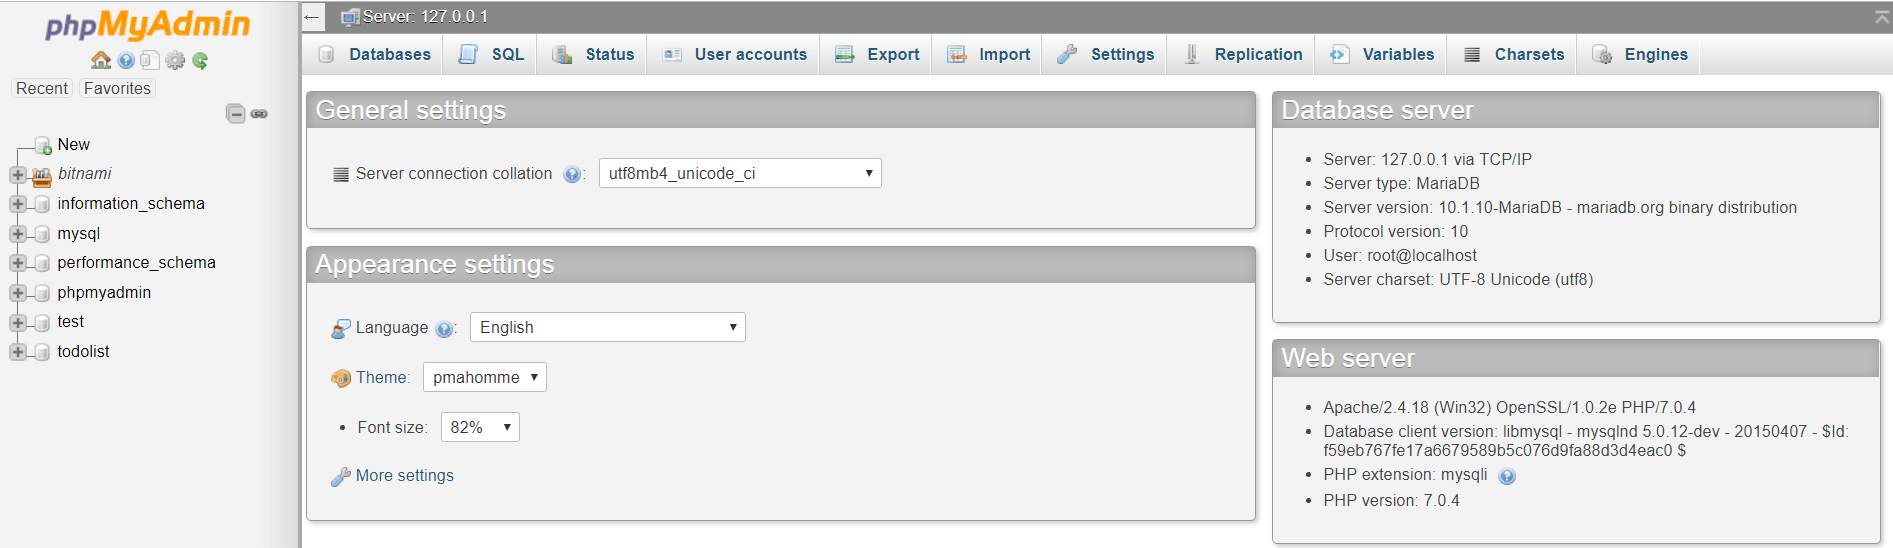
This interface allows you to perform below operation on MySQL database using web page.
- Database – Create and List Database
- SQL – Run SQL Queries against the database
- Status
- User Accounts
- Export
- Import
- Settings
- Replication
- Variables
- Charset
- Engine
Create Database
Now let’ see how to create a database in MySQL.
You can either use Database Tab or click on New Database link on the left-hand side navigation bar. Enter database name and collation and click Create button.
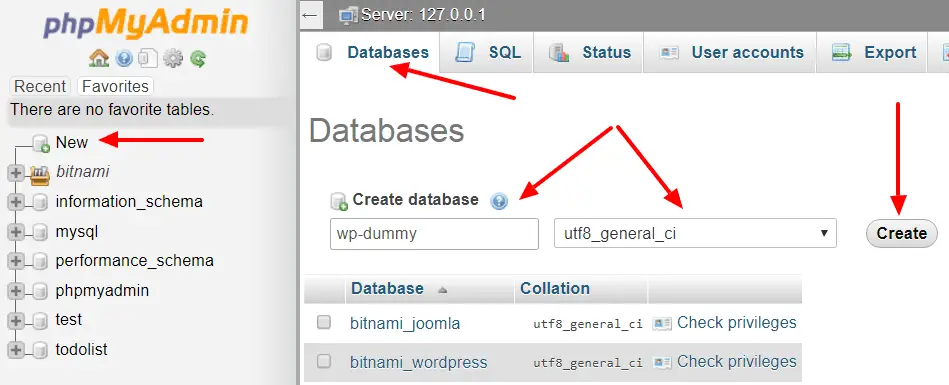
This should create the required database and you can see it in the list on the right-hand side of the navigation.
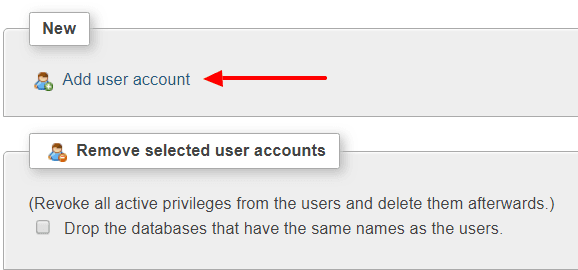
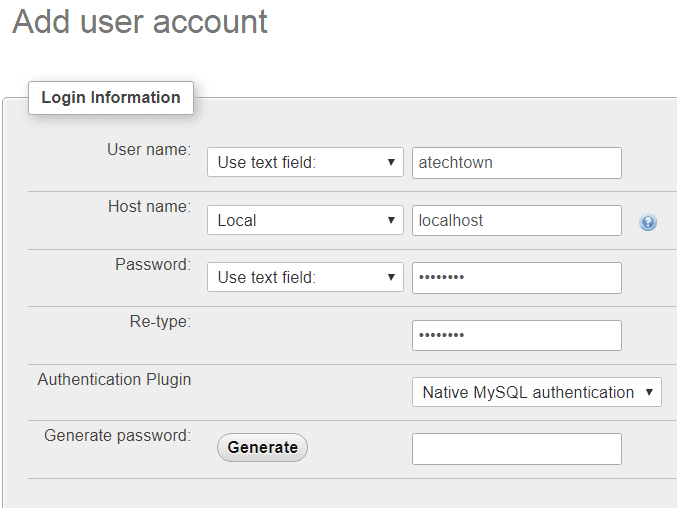
Create User
The default user is root. For the installation of specific cms, you need to create a user. Click on the User Accounts tab. The next window displays all the existing user information. Scroll down and click Add user account link as shown below.
Enter User Name, Host Name, and Password as shown below. You can also select privilege to this user in the same window.
After entering all information, scroll down and click the Go button.
This is the way you can use XAMPP MySQL Service and use PHPMyAdmin to work with MySQL to create required objects like a database, user or table, and other.
I hope you found this useful. Please share.